The sight of a cracked tile can send shivers down any homeowner’s spine. But before you start visualizing demolition and dust bunnies, take a deep breath! Fixing a cracked tile without replacing it is entirely possible, and with the right approach, your floor will be back to its original glory in no time.
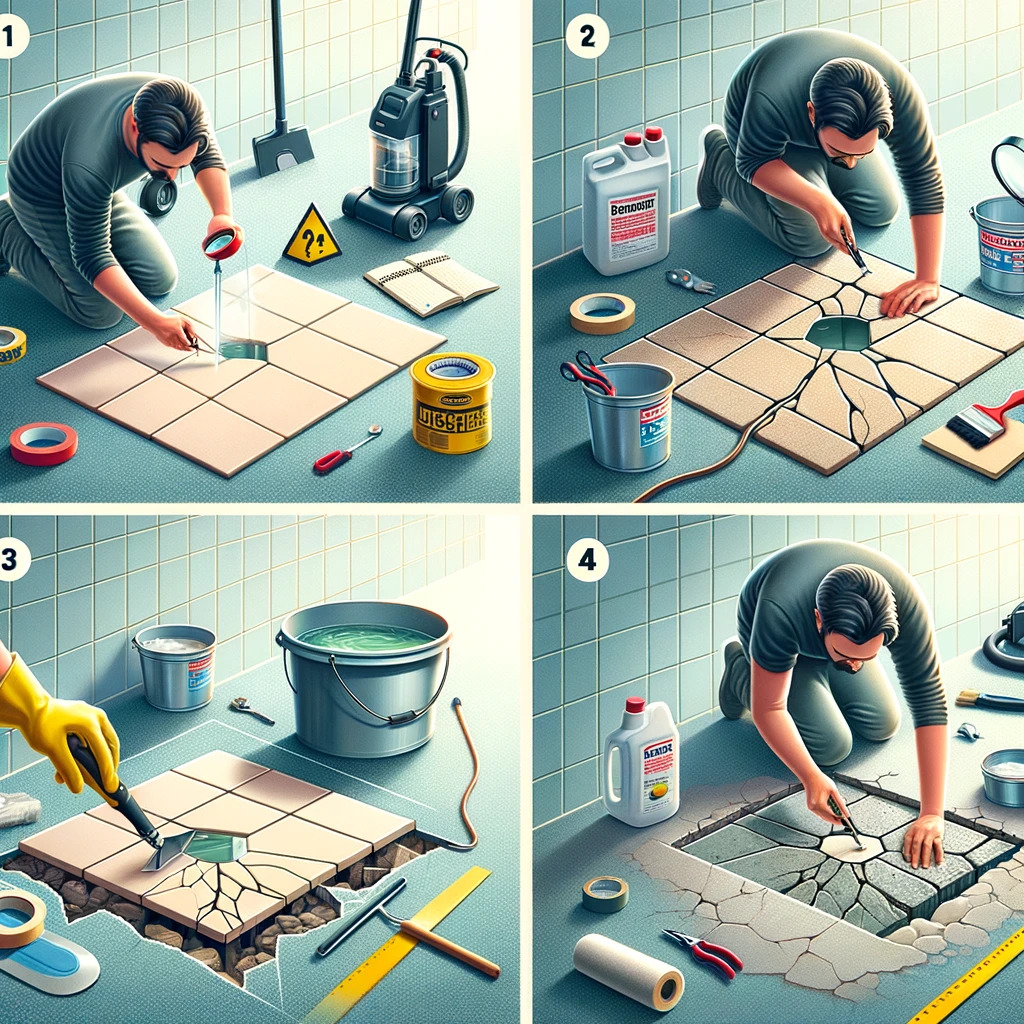
Step 1: Diagnosis – Unmasking the Crack’s Culprit

A cracked tile on your floor can be more than just an eyesore; it can be a symptom of a deeper problem lurking beneath the surface. Before you grab the epoxy and patch, take a moment to become a detective! Unmasking the crack’s origin story is crucial for choosing the right repair method and preventing future fractures from appearing.
The Subterranean Suspects:
- Shifting Foundations: A shifting foundation, caused by soil movement or structural settling, can create uneven stresses on your floor, leading to cracks in your tiles. Look for signs like uneven floors, sticking doors, or cracks in walls near the affected area.
- Subfloor Woes: An unstable or damaged subfloor can lose its support over time, causing tiles to flex and crack. Watch out for bouncy or uneven floor sections, especially near doorways or areas with heavy furniture.
The Installation Impasse:
- Mortar Mishap: Insufficient or improperly applied mortar underneath the tiles can leave them vulnerable to movement and cracking. Check for hollow-sounding tiles or tiles that easily lift at the edges.
- Grouting Gaffe: Improper grouting can leave gaps between tiles, allowing moisture to seep in and weaken the adhesive, leading to cracks. Look for loose or discolored grout lines around the cracked tile.
The Environmental Enigma:
- Thermal Tales: Extreme temperature fluctuations can cause tiles to expand and contract, putting stress on the grout and leading to cracks. This is especially common in areas with significant seasonal temperature changes.
- Moisture Mayhem: Water infiltration from leaks, spills, or even high humidity can weaken the adhesive and subfloor, leading to tile loosening and cracking. Look for signs of water damage like discoloration, mold growth, or warped tiles.
The Impact Interrogation:
- Accidental Encounters: Dropping heavy objects or furniture on the floor can cause immediate cracks or chip off pieces of the tile. Examine the crack pattern and surrounding area for clues about the source of impact.
- Chronic Stress Cracks: Continuous stress from heavy foot traffic or furniture can create hairline cracks over time. This is often seen in high-traffic areas like hallways and entryways.
Beyond the Surface:
- Tile Quality: Consider the age and quality of the tile itself. Older or low-quality tiles may be more prone to cracking due to natural wear and tear or inherent material weaknesses.
Remember: A thorough investigation is key to pinpointing the culprit behind the cracked tile. By carefully examining the crack itself, the surrounding area, and considering potential contributing factors like the environment and past events, you can make an informed decision about the best repair method and ensure long-lasting results.
Step 2: Surface Prep – Transforming the Battleground
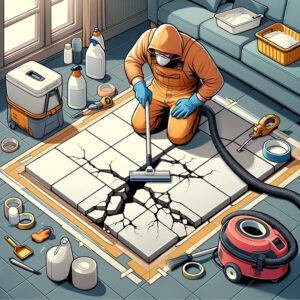
With the crack’s culprit identified, it’s time to roll up your sleeves and transform the surrounding area into a pristine canvas for repair. This crucial step ensures the patch adheres flawlessly and blends seamlessly with the existing tiles, creating a smooth, aesthetically pleasing finish.
Gathering Your Arsenal:
- Safety First: Don’t underestimate the dust! Equip yourself with gloves, goggles, and a dust mask for optimal protection.
- Cleaning Crusaders: A bucket of warm water, mild detergent, and a sponge will be your weapons against grime and residue.
- Scraping Savvy: A sturdy putty knife or chisel will help remove loose fragments, debris, and any existing grout around the crack.
- Vacuum Power: A powerful vacuum cleaner with a brush attachment will suck up dust and debris, leaving a clean slate.
- Masking Marvels: Painter’s tape will become your strategic shield, protecting nearby tiles and fixtures from accidental grout or patch spills.
- Cracking Cleanup: Depending on the crack type, you might need additional tools like a diamond-tipped drill bit (for cleaning wider cracks) or a razor blade (for removing stubborn grout remnants).
Deployment Strategies:
- Clear the Area: Like a seasoned general, secure the perimeter. Move furniture and belongings away from the repair zone to avoid accidental damage or obstruction.
- Deep Cleanse: Unleash the soapy sponge and meticulously scrub the area around the crack, removing dirt, grime, and any existing grout residue. Pay special attention to the crack itself, ensuring it’s free of debris for optimal patch adhesion.
- Scraping Precision: Send in the putty knife or chisel to gently remove any loose fragments or debris from the crack. Be careful not to damage the surrounding tiles or widen the crack further.
- Vacuum Blitz: Deploy the vacuum cleaner to suck up any remaining dust and debris, leaving a clean and dust-free surface for the patch.
- Masking Maneuvers: Strategically place painter’s tape around the crack and slightly beyond its edges to protect nearby tiles and fixtures from accidental grout or patch spills.
Special Tactics for Different Terrain:
- Glazed Tiles: For glossy tiles, use a deglosser to remove the shine and create a better grip for the patch.
- Porous Tiles: For porous tiles, apply a penetrating sealer to prevent the patch material from being absorbed into the tile.
- Deep Cracks: For wider cracks, consider using a diamond-tipped drill bit to clean the crack’s interior, ensuring optimal patch adhesion and preventing future cracking.
- Stubborn Grout: If existing grout is difficult to remove, a razor blade can be used carefully to scrape away the edges, but avoid damaging the tile surface.
Remember: Surface preparation is not just a chore, it’s an investment in the success of your repair. By meticulously cleaning, removing debris, and protecting surrounding areas, you create the ideal platform for the patch to adhere seamlessly and achieve a professional-looking finish.
Step 3: Crack Conquest – Filling the Gaps with Precision
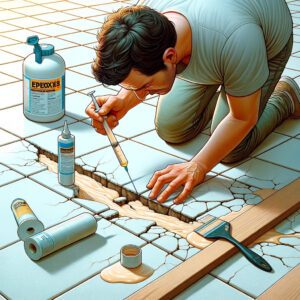
With the battleground prepped and ready, it’s time to unleash your inner tile surgeon and fill the cracks with meticulous precision! Choosing the right technique and material is crucial for a durable, seamless repair that stands the test of time.
Crack Cavalry Assemble:
- Hairline Heroes: For hairline cracks, a high-quality epoxy resin will be your champion. Choose an epoxy specifically designed for tile repair, ensuring flexibility and adhesion.
- Grout Guardians: For wider cracks, a grout crack repair kit will be your trusted ally. Select a color matching your existing grout and choose a formula suitable for the crack size and depth.
- Missing Piece Menders: For chipped or missing sections, a pre-mixed tile patch compound will become your knight in shining armor. Opt for a compound that matches the color and texture of your tiles for a natural finish.
- Diamond Drill Specialists (Optional): For deep cracks exceeding 1/4 inch, a diamond drill bit can be your secret weapon. This tool will clean and widen the crack’s interior for optimal patch filling and prevent future stress on the edges.
Deployment Strategies:
- Hairline Crack Tactics: Apply the epoxy resin using a syringe or a small spatula, ensuring it fills the crack completely. Smooth out any excess with a damp cloth before it dries.
- Grout Gap Guardians: Follow the specific instructions of your chosen grout crack repair kit. Typically, you’ll mix the grout, apply it with a grout float, and smooth it out flush with the tile surface. Allow for proper drying time as instructed.
- Missing Piece Menders: Fill the missing section with the pre-mixed tile patch compound, pressing it firmly into the void. Use a putty knife to level the surface and match the surrounding tile texture. Allow for proper drying time before sanding for a smooth finish.
- Diamond Drill Delicacy (Optional): Use the diamond drill bit with caution and precision, ensuring you only clean and widen the crack’s interior without damaging the surrounding tiles. Follow the manufacturer’s instructions for proper use and safety.
Pro Tips for Flawless Filling:
- Work in sections: For large cracks or missing sections, tackle the repair in smaller sections to avoid overwhelming the material and ensure proper adhesion.
- Moisturize for adhesion: For epoxy resins, dampen the crack slightly before applying to improve adhesion.
- Overfill is better than underfill: When filling cracks, slightly overfill to ensure the material settles evenly and prevents future gaps.
- Smooth is the goal: Once the patch is dry, use fine-grit sandpaper (120-220 grit) to smooth the surface and match the surrounding tile texture.
- Clean up meticulously: Remove any excess grout or patch material with a damp sponge before it dries completely.
Remember: Crack filling is an art that demands precision and patience. By choosing the right material, applying it with care, and paying attention to the details, you can transform those unsightly cracks into virtually invisible scars, restoring the beauty and functionality of your floor.
Step 4: Grouting Glory – Sealing the Deal

With the crack filled and smooth, it’s time to add the final flourish – a seamless, professional-looking grout finish! This step goes beyond aesthetics, ensuring the repaired area is protected from moisture and debris, preventing future cracks and maintaining the structural integrity of your floor.
Gathering Your Grouting Gear:
- Grout Gladiator: Choose a high-quality grout specifically formulated for tile repair, ensuring flexibility and adhesion. Opt for a color that matches your existing grout for a unified look.
- Grout Gauntlet: A rubber grout float will be your trusty companion for applying and smoothing the grout. Choose a size suitable for the area you’re working on.
- Sponge Cavalry: A damp sponge will be your cleanup champion, wiping away excess grout and creating a smooth finish.
- Grout Cleaning Crew: A bucket of clean water and a grout cleaner (diluted according to the manufacturer’s instructions) will help remove any remaining grout residue after drying.
- Sealing Sentinel (Optional): If you’re looking for extra protection against moisture and stains, consider a grout sealer. Choose a sealer suitable for the type of grout and tile you have.
Deployment Strategies:
- Mixing Mastery: Mix the grout according to the manufacturer’s instructions, ensuring a smooth, non-runny consistency. Remember, a slightly wetter consistency is easier to work with, but avoid being too watery.
- Applying with Precision: Using the rubber grout float, apply the grout diagonally across the tile joints, pushing it firmly into the gaps. Work in sections, avoiding applying too much grout at once.
- Smoothing the Way: After applying the grout to a section, use the float to smooth it out flush with the tile surface. Work in a circular motion and ensure there are no gaps or uneven areas.
- Wipe Away the Excess: After a few minutes (refer to the grout instructions for specific timing), use the damp sponge to remove excess grout from the tile surface. Work diagonally across the tiles, rinsing the sponge frequently to avoid spreading the grout.
- Polish to Perfection: Once the grout is completely dry (usually 24-48 hours), buff the tiles with a dry felt cloth to remove any remaining residue and achieve a polished finish.
Pro Tips for Grouting Glory:
- Work in sections: Don’t attempt to grout the entire floor at once. Tackle it in manageable sections to maintain control and prevent the grout from drying unevenly.
- Clean as you go: Regularly rinse the sponge to remove excess grout and prevent it from staining the tiles.
- Tool maintenance: Keep your rubber grout float clean and free of dried grout for optimal application.
- Sealing for longevity (Optional): For extra protection against moisture and stains, apply a grout sealer after the grout is completely dry. Follow the instructions on the sealer carefully.
- RenovationServices.com – Your Grouting Guru: If you’re unsure or prefer professional assistance, RenovationServices.com offers expert grouting services. Their experienced technicians will handle the job seamlessly, ensuring your floor receives the perfect finishing touch.
Remember: Grouting is the final brushstroke of your tile repair masterpiece. By choosing the right materials, applying it with precision, and cleaning meticulously, you create a seamless, durable finish that protects your repaired area and enhances the overall beauty and functionality of your floor.
Bonus Tip: RenovationServices.com – Your Partner in Flooring Perfection
If the crack is extensive, the subfloor is compromised, or you simply prefer professional help, RenovationServices.com can be your one-stop shop for all your flooring needs. Our team of experienced technicians has the expertise and equipment to handle any floor repair, big or small. From crack repair and grouting to complete tile replacement and installation, they’ll ensure your floors are not only flawless but also perfectly suited to your style and needs.
Remember: Fixing a cracked tile without replacement requires patience, precision, and the right tools. By following these steps, choosing the appropriate repair method, and seeking professional help if needed, you can restore your floor to its former beauty and enjoy it for years to come.
General Repair and Maintenance:
- National Institute of Standards and Technology (NIST): Provides information on building materials and construction practices, including tile installation and repair. You can find their publications and technical documents here: https://www.nist.gov/buildings-construction
- U.S. Department of Housing and Urban Development (HUD): Offers resources on home improvement and maintenance, including tips for repairing cracked tiles. Check out their Home Improvement Information Center: https://www.huduser.gov/
- Environmental Protection Agency (EPA): Provides information on safe handling of materials like epoxy and grout, which are used in tile repair. You can find their guidelines on hazardous waste management here: https://www.epa.gov/hw