
The iconic skyline of New York City isn’t just about towering steel and dazzling lights. Nestled among these giants are countless homes, weathering the wind and storms, year after year. But when rain turns into an unwelcome guest, dripping through your ceiling and spreading damp misery, the urban dream can quickly feel like a leaky nightmare.
This guide is your weapon against the drips, a step-by-step manual to conquering leaky roofs in the five boroughs – Brooklyn, Staten Island, Queens, Long Island, and the heart of it all, Manhattan. Whether you’re a seasoned DIY warrior or a rookie facing your first roof battle, this guide will equip you with the knowledge and resources to identify the enemy, strategize your attack, and ultimately achieve victory – a dry, secure haven above your head.
Remember, a leaky roof isn’t just an annoyance; it’s a ticking time bomb, potentially damaging your home’s structure, fostering mold growth, and causing costly repairs down the line. So, the sooner you identify and address the leak, the better.
Before we dive into the trenches, let’s understand the diverse landscape of New York City rooftops.
Roofscapes of the City: Navigating the Different Types

From flat asphalt expanses to charming shingle slopes, the roofs of New York City are as varied as its inhabitants. Knowing your enemy’s terrain is crucial, so here’s a quick guide to the most common roof types:
-
Flat Roofs: Often found on commercial buildings and low-rise apartments, flat roofs rely on a waterproof membrane and proper drainage systems to keep water at bay.
-
Asphalt Shingle Roofs: The classic choice for many houses, asphalt shingles offer good protection and easy maintenance.
-
Slate Roofs: These durable and elegant roofs grace older buildings and historic districts, but their repair requires specialized skills.
-
Metal Roofs: Increasingly popular for their longevity and fire resistance, metal roofs come in various types, like standing seam or corrugated metal.
Once you’ve identified your roof type, it’s time to become a detective and track down the source of the leak. Part 1 of our guide will equip you with the tools and tactics needed for this crucial mission.
Part 1: Unmasking the Culprit – Locating the Leaky Intruder
A silent enemy lurks above, dripping its discontent. But before you grab your tools and charge into battle, a good detective knows the importance of a thorough investigation. In this part, we’ll guide you through the steps of uncovering the source of your roof leak:
1. The Telltale Signs:
Before climbing onto the roof, keep your eyes peeled inside your home. Water leaks rarely announce themselves subtly. Look for these clues:
- Water Stains: Dark patches on ceilings or walls, often accompanied by peeling paint or plaster, betray the path of the water’s descent.
- Mold Growth: Dampness invites unwanted guests like mold, appearing as fuzzy patches or discolored areas.
- Sagging Roof: If your ceiling seems to droop or buckle, it could indicate waterlogged roof structures.
- Cracks and Gaps: Inspect walls and ceilings near rooflines for cracks or gaps that might allow water entry.
2. Climbing the High Ground:
Now, it’s time to get up close and personal with your roof. Remember, safety first! Wear sturdy shoes, gloves, and proper clothing if climbing onto your roof. If unsure, consider bringing in a professional for a safer and more thorough inspection.
Once up there, take a good look around:
- Missing or Damaged Shingles: Look for gaps, tears, or curled shingles that could let water penetrate.
- Clogged Gutters and Downspouts: Overflowing gutters or blocked downspouts can back up water and cause leaks.
- Damaged Flashing: The metal sheeting around chimneys, vents, and skylights is crucial for waterproofing. Check for rust, cracks, or loose seals.
- Debris Buildup: Leaves, branches, and other debris can trap water and lead to leaks.
3. The Sherlock Holmes Method: Unmasking the Hidden Leaks

Sometimes, the leak’s location isn’t as obvious as a gaping hole in your roof. Don’t despair! Just like Sherlock Holmes, with a little detective work and the right tools, you can uncover the hidden culprit. Here are some advanced sleuthing techniques:
The Hose Test: Turn off your main water valve and disconnect any hoses connected to your home’s exterior. Then, grab a garden hose and simulate rain by spraying water gently across different sections of your roof. Start from the suspected area and work your way outwards, observing for any water penetration or dripping inside your home. Be careful not to over-spray and remember to turn the water back on once finished.
The Attic Inspection: If you have access to your attic, head up there and examine the underside of the roof deck. Look for water stains, mold growth, or sagging areas, which can point you towards the leak source. You might even be able to hear dripping sounds if the leak is active.
The Moisture Meter: This handy tool can be your secret weapon. Use a moisture meter to check for moisture levels in different parts of your roof deck and ceiling. Higher moisture readings can indicate the location of the leak.
The Infrared Camera: For a truly high-tech approach, consider using an infrared camera. These cameras can detect temperature variations that often accompany leaks, making it easier to pinpoint their location. While this might require professional help, it can be invaluable for locating hidden leaks, especially on flat roofs.
Professional Assistance: If your attempts at detective work leave you stumped, don’t hesitate to call in the pros. Experienced roofers have the expertise and tools to quickly and accurately identify the source of your leak. They can also assess the extent of the damage and recommend the best course of action for repair.
Remember, a prompt diagnosis is crucial for minimizing the damage caused by a leak. Don’t wait for the drips to turn into a downpour before taking action.
Part 2: Repair Strategies – From DIY Fixes to Pro Solutions

The detective work is done, the culprit unmasked. Now, it’s time to roll up your sleeves and confront the enemy head-on – fixing the leaky roof! In this part, we’ll navigate the terrain of repairs, offering both DIY options for minor leaks and guidance on finding the right professional for bigger jobs.
Before you take any action, remember safety first! Working on a roof can be dangerous, so ensure you have sturdy shoes, gloves, and proper clothing. If the roof pitch is steep or you’re uncomfortable with heights, it’s always best to seek professional help.
1. DIY Battle Tactics: Fixing Minor Leaks Like a Pro
For small leaks, where the culprit is a missing shingle, a tear in the membrane, or a loose flashing around a vent, you can wage your own mini-repair war. Here are some DIY weapons in your arsenal:
-
Shingle Replacement: Locate the missing or damaged shingle. Carefully pry up the surrounding shingles to expose the nail heads. Gently remove the damaged shingle and slide the new one underneath the exposed nails. Hammer the nails back in securely and re-seal the surrounding shingles with roofing cement.
-
Flashing Repair: Identify the loose or damaged flashing around chimneys, vents, or skylights. Use a screwdriver or pry bar to carefully lift the flashing and apply a generous amount of roofing sealant underneath. Press the flashing back into place and secure it with screws or nails.
-
Caulking and Sealing: Cracks and gaps around roof elements like chimney bases, vent pipes, and roof junctions can be sealed with caulk. Choose the appropriate caulk type based on the material you’re sealing and apply it generously, filling all gaps and ensuring a smooth finish.
-
Gutter and Downspout Cleaning: Clogged gutters can cause water to back up and leak underneath the shingles. Regularly clean your gutters and downspouts to ensure proper water flow.
Remember, DIY repairs work best for small leaks and require basic skills and tools. If you’re unsure about the leak’s severity, the damage seems extensive, or your roof is steep or in poor condition, it’s crucial to call in the professionals.
2. When to Call in the Big Guns: Seeking Professional Help for Major Leaks
Sometimes, the enemy is too formidable for a DIY warrior. Large leaks, structural damage, complex roof types like slate or metal, and high-pitched roofs are best left to experienced roofers. Here’s how to find the right one:
-
Get Recommendations: Ask friends, family, or neighbors for recommendations of reliable roofers in your area. Online reviews and ratings can also be helpful.
-
Check Qualifications: Ensure the roofer is licensed and insured, and ask about their experience with similar repairs.
-
Get Multiple Quotes: Compare quotes from at least three different roofers before making a decision. Don’t just choose the cheapest option – consider experience, qualifications, and warranty coverage.
-
Ask Questions: Discuss the problem in detail with the roofer and ask about their proposed repair plan, materials, and estimated timeline.
Once you’ve chosen the right roofer, sit back and let the professionals take care of the battle. They have the expertise, tools, and manpower to handle even the most challenging leaks.
3. The Repair Battlefield: What to Expect from a Professional Fix

The exact repair process will depend on the nature and extent of the leak. However, here’s a general overview of what to expect:
-
Inspection and Assessment: The roofer will thoroughly examine the roof, identify the leak source and extent of damage, and create a detailed repair plan.
-
Preparation and Protection: The area around the work area will be secured to protect both property and people from falling debris.
-
Removal and Replacement: Depending on the severity of the damage, the roofer may need to remove and replace damaged shingles, flashing, or even entire sections of the roof deck.
-
Underlayment and Waterproofing: A new underlayment or waterproofing membrane will be installed to prevent future leaks.
-
Flashing and Sealing: Damaged flashing will be repaired or replaced, and all critical points will be properly sealed to prevent water infiltration.
-
New Shingle Installation: New shingles will be installed according to the manufacturer’s specifications and local building codes.
-
Cleanup and Inspection: The work area will be cleaned up thoroughly, and the roofer will perform a final inspection to ensure the repair is complete and watertight.
4. Victory Beyond the Drips: Maintenance Strategies for a Leak-Free Future

-
Regular Inspections: Schedule annual inspections by a qualified roofer to identify and address any potential problems early on. A small crack patched today can prevent a major leak tomorrow.
-
Gutter and Downspout Cleaning: Clean your gutters and downspouts at least twice a year, especially before and after fall leaf drop. Clogged gutters can cause water to back up and leak under the shingles.
-
Debris Removal: Regularly remove leaves, branches, and other debris from your roof to prevent them from clogging gutters or damaging the shingles.
-
Trim Overhanging Branches: Keep tree branches away from your roof to prevent punctures or damage. Pruning branches regularly minimizes the risk of fallen leaves and debris accumulating on your roof.
-
Proper Ventilation: Ensure proper attic ventilation to prevent moisture buildup and mold growth. Adequate attic ventilation allows trapped moisture to escape, reducing the risk of it condensing and causing leaks.
-
Flashing Maintenance: Pay special attention to flashing around chimneys, vents, and skylights, as these areas are prone to wear and tear. Inspect them regularly for signs of damage and repair any cracks or leaks promptly.
Remember, proper maintenance is an investment in your home’s longevity and your peace of mind. By following these strategies, you can prevent future leaks, extend the lifespan of your roof, and avoid costly repairs down the line.
Should you ever find yourself facing the drip-drip-drip again, don’t despair! This guide will be your weapon, equipping you with the knowledge and resources to identify the leak, choose the right repair strategy, and maintain a leak-free haven above your head. And if the battle seems too daunting, remember, reinforcements are just a call away in the form of experienced roofers.
Bonus: Resources for Your Roof War Arsenal
- Your local building department: They can provide information on building codes and regulations pertaining to roof repairs.
- The National Roofing Contractors Association (NRCA): This organization offers valuable resources on roof maintenance and repair, including a directory of qualified roofers.
- The Asphalt Roofing Manufacturers Association (ARMA): This organization provides information about asphalt shingles and their proper installation and maintenance.
- The Slate Roofing Contractors Association (SRCA): This organization offers information about slate roofs and their unique repair needs.
With the right knowledge, tools, and resources, you can conquer any leak that comes your way and enjoy a dry, peaceful haven in the heart of the Big Apple. Remember, a leak-proof roof is more than just a functional necessity; it’s a symbol of security, comfort, and the quiet satisfaction of knowing you’ve won the battle against the drips.
So, take a deep breath, grab your tools (or phone book if calling in the pros), and prepare to reclaim your roof – and your peace of mind – from the tyranny of leaks!
Part 3: Major Repairs and Professional Help
1. When to Call a Pro: Recognizing the Need for Expert Intervention
While minor leaks may tempt you to grab your toolbox and dive in, some situations demand the expertise and safety of a professional roofer. Here are some red flags that signal it’s time to call in the reinforcements:
- Extensive Roof Damage: Large areas of missing shingles, widespread rot or decay, or visible structural compromises require a trained eye and experienced hands to assess and remedy. Attempting DIY repairs on such extensive damage can worsen the situation and pose safety risks.
- Leaks Near Chimneys or Skylights: These areas often involve complex flashing and intricate connections to the main roof. Improper repairs near chimneys or skylights can lead to fire hazards, water infiltration, and costly rework.
- Concerns About Structural Integrity: Sagging roof sections, cracks in the roof deck, or uneven settling are indicative of potential structural issues. These require specialized knowledge and equipment to diagnose and address, as neglect can compromise the entire building’s integrity.
- Steep or Difficult-to-Access Roofs: Working on a high-pitched or awkwardly angled roof demands exceptional physical agility and safety expertise. Attempting DIY repairs on such roofs can result in serious injuries and further damage.
- Lack of Confidence or Expertise: If you don’t feel comfortable identifying the leak source, selecting the appropriate repair materials, or executing the work safely, don’t hesitate to seek professional help. A qualified roofer will ensure a competent and lasting repair, saving you time, money, and potential headaches.
2. Finding the Right Roofer: Navigating the Sea of Expertise

With the decision to call in a professional made, the next crucial step is choosing the right roofer. Here are some tips to navigate the landscape of roofing companies and find the perfect match for your needs:
- Reputation and Reviews: Start your search by checking online reviews and testimonials from past clients. Look for consistent positive feedback regarding quality of work, reliability, and communication.
- Licensing and Insurance: Ensure the roofer is licensed and insured in your state and city. This protects you from liability in case of accidents or property damage during the repair process.
- Experience and Specialization: Choose a roofer with experience in handling leaks similar to yours, especially if your roof type requires specialized knowledge or materials.
- Local Knowledge and Expertise: Consider roofers familiar with the specific building codes, weather conditions, and common roof issues in your area. Local roofers often have established relationships with suppliers and offer competitive pricing.
- Get Multiple Quotes: Don’t settle for the first offer. Contact several roofers, explain your situation in detail, and request detailed quotes outlining the scope of work, materials, and timeline. Comparing quotes helps you ensure you’re getting fair pricing and quality service.
- Communication and Transparency: Choose a roofer who readily answers your questions, explains the proposed work in clear terms, and provides a written contract outlining the agreed-upon scope, timeframe, and cost.
3. The Repair Process: A Glimpse into the Professional Approach
Once you’ve chosen the right roofer, it’s time to sit back and let the professionals take the reins. Here’s a general overview of the major repair process:
1. Inspection and Assessment: The roofer will conduct a thorough inspection of your roof, including a visual examination, moisture detection tests, and potentially infrared imaging for concealed leaks. They will identify the leak source, assess the extent of damage, and determine the necessary repairs. Expect a detailed report outlining the findings, proposed solutions, and estimated costs.
2. Preparation and Protection: The area around the work zone will be secured with safety barriers and tarps to protect both your property and the workers from falling debris. Permits may be required for major repairs, and the roofer will handle obtaining these.
3. Removal and Replacement: Depending on the damage, the roofer may need to remove and replace damaged shingles, flashing, underlayment, or even sections of the roof deck. This involves careful removal of existing materials, ensuring proper disposal, and preparing the underlying structure for the new installation.
4. Underlayment and Waterproofing: A new underlayment or waterproofing membrane will be installed to provide an additional layer of protection against water infiltration. The chosen material will depend on your roof type, local climate, and building codes.
5. Flashing and Sealing: Damaged flashing around chimneys, vents, and skylights will be meticulously repaired or replaced. All critical points, including valleys, edges, and penetrations, will be properly sealed with high-quality sealant to prevent further leaks.
6. New Shingle Installation: New shingles will be installed according to the manufacturer’s specifications and local building codes. The roofer will ensure proper alignment, overlapping, and
nail placement to achieve a watertight and aesthetically pleasing finish. Different shingle types require specific installation techniques, and the roofer’s expertise will ensure durability and long-lasting performance.
7. Cleanup and Inspection: Upon completion, the work area will be thoroughly cleaned, removing all debris and discarded materials. The roofer will perform a final inspection to confirm the repair is complete, watertight, and meets all safety and code requirements. They may also provide you with maintenance tips and warranty information for the installed materials and workmanship.
Bonus: Tools and Resources for Navigating Major Roof Repairs

- The National Roofing Contractors Association (NRCA): This organization offers valuable resources on major roof repairs, including educational materials, guidelines for hiring qualified roofers, and a directory of member companies.
- Your Local Building Department: They can provide information on specific building codes and permit requirements for major roof repairs in your area.
- Consumer Protection Agencies: These agencies offer tips for avoiding scams and choosing reputable contractors. Familiarize yourself with their resources and reporting procedures before engaging with any roofer.
Remember, investing in a professional major roof repair is an investment in your home’s safety, value, and longevity. By choosing a qualified roofer and understanding the general process, you can navigate the repair with confidence and ensure a leak-proof haven above your head for years to come.
Part 4: Maintenance and Prevention – Safeguarding Your Roof for the Long Haul

The battle against leaks might be won, but the war for a perpetually dry roof requires vigilance and proactive maintenance. Neglecting your roof is like inviting the enemy back for a rematch, with the potential for costly repairs and compromised structural integrity. In this final chapter, we’ll equip you with the know-how to transform your roof from a potential battlefield into a fortress of peace.
1. Regular Inspections: Your Early Warning System
Think of roof inspections as your annual physical for your home’s crown jewel. Just like regular checkups, they catch potential problems early, preventing them from escalating into major leaks and costly repairs. Schedule a professional inspection by a qualified roofer at least once a year, preferably before and after the harsh winter months. During the inspection, the roofer will:
- Identify Minor Damage: They’ll check for missing or damaged shingles, cracked flashing, clogged gutters, and any signs of moisture infiltration. Early detection of these issues allows for swift and affordable repairs, preventing them from snowballing into bigger problems.
- Assess Wear and Tear: The roofer will evaluate the overall condition of the shingles, underlayment, and flashing, identifying areas showing signs of aging or wear. Proactive replacements of worn-out components extend the lifespan of your roof and minimize the risk of leaks.
- Preventative Measures: Based on the inspection findings, the roofer can recommend preventative measures like additional ventilation, moss removal, or tree trimming to ensure optimal roof health and longevity.
Remember, an ounce of prevention is worth a pound of leak-inducing repairs. Regular inspections are your first line of defense, empowering you to nip potential problems in the bud and maintain a watertight haven above your head.
2. Gutter and Downspout Patrol: No More Clogged Champions
Think of your gutters as the loyal knights defending your roof from the watery onslaught. Clogged gutters, however, are like fallen soldiers, allowing water to overflow and seep under the shingles, causing leaks and structural damage. To keep your gutter-guards performing their heroic duty:
- Clean your gutters regularly: At least twice a year, especially before and after fall leaf drop, remove leaves, twigs, and any debris clogging the channels. Use a ladder and proper safety equipment, or consider hiring professional gutter cleaning services for taller buildings or complicated rooflines.
- Inspect for damage: Check for rust, dents, or leaks in your gutters and downspouts. Promptly repair any damage to prevent leaks and ensure smooth water flow.
- Consider gutter guards: These handy tools can minimize the need for frequent cleaning by preventing leaves and debris from entering the gutters in the first place. Consult a professional to choose the right type of gutter guard for your roof and climate.
By keeping your gutter-knights free from clogs and damage, you ensure they can effectively channel rainwater away from your roof, minimizing the risk of leaks and safeguarding its structural integrity.
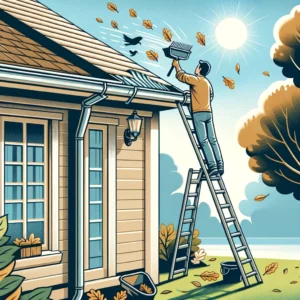
3. Debris Removal: Keeping the Roof Unburdened

A roof burdened with leaves, branches, and other debris is like a soldier weighed down by heavy armor. It becomes sluggish, susceptible to leaks, and prone to premature wear and tear. To keep your roof agile and resilient:
- Regularly remove debris: After storms, check your roof for fallen leaves, branches, and any other debris that might accumulate. Promptly remove them to prevent moisture buildup and potential damage to the shingles.
- Trim overhanging branches: Branches brushing against your roof can scrape and damage shingles, creating entry points for leaks. Trim overhanging branches regularly to maintain a safe distance from your roof and prevent debris accumulation.
- Beware of moss and algae: Moss and algae growth can trap moisture and deteriorate shingles, leading to leaks. Clean your roof periodically with a specialized moss and algae removal solution to maintain its integrity and extend its lifespan.
By keeping your roof free of debris, you lighten its load, allowing it to perform its protective duties effectively and last for years to come.
4. Ventilation Matters: Let Your Roof Breathe
Just like we need fresh air to thrive, so does your roof. Proper attic ventilation allows trapped moisture to escape, preventing condensation and mold growth that can weaken the roof structure and contribute to leaks. Ensure proper ventilation by:
- Checking your vents: Inspect roof vents and attic fans for blockages or malfunctioning. Ensure they are clear and functioning properly to promote air circulation.
- Installing additional vents: If your attic ventilation is inadequate, consider installing additional roof vents or attic fans to improve air circulation and prevent moisture buildup.
- Maintaining proper insulation: Ensure your attic insulation is properly installed and not blocking ventilation pathways. Adequate insulation prevents energy loss from the home while allowing for proper air circulation within the attic.
By letting your roof breathe, you prevent the detrimental effects of trapped moisture, promoting its longevity and keeping
keeping leaks at bay.
5. The Power of Knowledge: Your Roof’s Instruction Manual

Every roof, like a complex machine, comes with its own set of needs and maintenance requirements. Familiarize yourself with the manufacturer’s specifications for your specific shingle type, underlayment materials, and flashing components. This knowledge empowers you to:
- Identify potential issues: Understanding the recommended maintenance practices and expected lifespan of your roof materials allows you to spot early signs of wear and tear before they lead to leaks.
- Perform basic maintenance: Some minor repairs, like replacing missing or damaged shingles, can be DIY tasks if you understand the proper techniques and materials specific to your roof type.
- Ask informed questions: When consulting a professional roofer, your understanding of your roof’s materials and needs allows you to ask specific questions and make informed decisions regarding repairs and maintenance.
Knowledge is your ultimate weapon against leaks. By understanding your roof’s intricacies, you are better equipped to care for it, extending its lifespan, and preventing the need for costly repairs down the line.
Conclusion: A Leaky-Free Future Awaits
Conquering leaks isn’t just about winning a battle; it’s about securing a lasting victory for your home’s well-being and your own peace of mind. By following the strategies outlined in this guide, you can transform your roof from a potential battlefield into a fortress of leak-proof comfort. Remember:
- Regular inspections: Early detection is key to preventing small issues from morphing into major leaks. Schedule annual inspections and address any identified concerns promptly.
- Gutter and downspout patrol: Keep your water-fighting knights clean and functional to ensure smooth rainwater flow and prevent leaks.
- Debris removal: Don’t let your roof become weighed down; regularly remove leaves, branches, and other debris to maintain its structural integrity and prevent moisture buildup.
- Ventilation matters: Let your roof breathe; ensure proper attic ventilation to prevent moisture build-up and potential leaks.
- The power of knowledge: Arm yourself with information about your specific roof type; understanding its needs and maintenance requirements empowers you to care for it effectively.
With proactive maintenance, informed decisions, and a little help from the professionals when needed, you can ensure a leak-free future for your beloved home. So, go forth, armed with knowledge and confidence, and keep the drips at bay, letting your roof stand tall as a symbol of security and comfort for years to come.
Brought to you by RenovationServices.com