Taming the Drip: A New Yorker’s Guide to Fixing Leaky Faucets in Brooklyn, Staten Island, Queens, Long Island, and NYC
The Big Apple may never sleep, but your faucet shouldn’t be joining the party with its incessant dripping. That persistent “plink-plonk” isn’t just annoying, it’s a drain on your wallet and a threat to your home’s plumbing health. But fear not, intrepid New Yorkers! This guide equips you with the knowledge and tools to tackle those leaky faucets yourself, regardless of your borough – Brooklyn, Staten Island, Queens, Long Island, or the bustling heart of NYC.
Before You Dive In: Assessing the Leak and Gathering Supplies
- Identify the Culprit: Is the leak coming from the handle, spout, or base of the faucet? This initial detective work determines the likely issue and repair approach.
- Turn Off the Water: Locate the shut-off valve under the sink and twist it clockwise until the water supply stops. Remember, safety first!
- Gather Your Tools: For most basic repairs, you’ll need a wrench (adjustable or basin, depending on your faucet type), pliers, screwdrivers (flat and Phillips), a bucket (to catch any water), and replacement parts (washers, O-rings, etc.). If your faucet is a more complex or vintage model, consider consulting a professional like RenovationServices.com, experts in handling all plumbing complexities across Brooklyn, Staten Island, Queens, Long Island, and NYC.
Step-by-Step Solutions for Common Leaks:
Handle Leak:
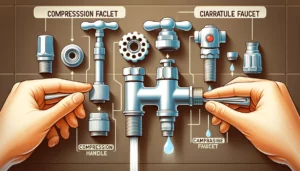
- Identify the Handle Type: Compression handles have a packing nut, while cartridge faucets have a screw or cap beneath the handle.
Repairing a Faucet Leak: Tightening the Packing Nut - Tighten the Packing Nut (Compression Faucets): Locate the nut below the handle, where the stem enters the faucet body. Using an adjustable wrench, gently tighten the nut clockwise until the drip stops. Don’t overtighten, as it can damage the faucet. If tightening doesn’t stop the leak, proceed to step 3.
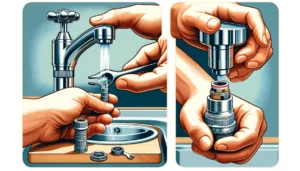
Step Three in Faucet Repair: Washer Replacement - Replace the Washer (Compression Faucets): Turn off the shut-off valve under the sink. Unscrew the handle screw or cap and remove the handle. Use pliers to grab the old washer at the base of the stem and pull it out. Insert a new washer of the same size and material, ensuring it sits flat and flush. Reassemble the handle and turn the water back on, checking for leaks.
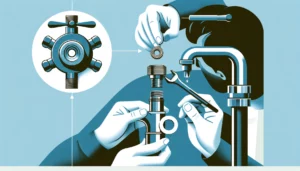
Final Step in Faucet Repair: Cartridge Change - Replace the Cartridge (Cartridge Faucets): Consult your faucet manual or online resources for specific cartridge removal and replacement instructions. Usually, you’ll need to remove the handle and any decorative cap, then unscrew or unclip the cartridge retaining ring. Gently pull out the cartridge and replace it with a new one of the same model. Follow the manual’s reassembly instructions and check for leaks.
Spout Leak:
- Identify the Spout Connection: Some spouts screw directly onto the faucet body, while others have a threaded connection at the base.
- Tighten the Spout (Threaded Connection): Use an adjustable wrench to tighten the threaded connection between the spout and the faucet body. Again, avoid overtightening. If tightening doesn’t stop the leak, proceed to step 3.
- Replace the Cartridge (Cartridge Faucets): A leaking spout in a cartridge faucet often indicates a faulty cartridge. Follow the steps in handle leak point 4 to replace the cartridge.
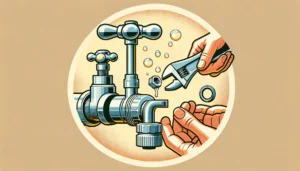
- Check the Aerator (Optional): The aerator, the small screen at the spout tip, can sometimes leak due to mineral buildup. Unscrew it and clean it with vinegar or a descaling solution before reinstalling it.
Base Leak:
- Identify the Leak Location: Check if the leak is coming from the base of the handle, where the stem enters the faucet body, or from the base of the faucet itself.
- Check the O-Ring (Handle Base Leak): If the leak is at the handle base, a worn O-ring is likely the culprit. Use a flathead screwdriver to pry out the old O-ring and replace it with a new one of the same size and material. Ensure it sits properly in its groove before reassembling the handle.
- Check the O-Ring (Faucet Base Leak): If the leak is coming from the base of the faucet itself, locate the O-ring where the faucet body connects to the countertop. Use a wrench to loosen the nuts holding the faucet in place, carefully lift it slightly, and replace the O-ring. Retighten the nuts and check for leaks.
- Inspect the Valve Seat (Advanced): In some cases, a damaged valve seat can cause a base leak. This repair requires advanced plumbing skills and specialized tools. If you suspect a valve seat issue, consider seeking help from a professional plumber like RenovationServices.com in your Brooklyn, Staten Island, Queens, Long Island, or NYC neighborhood.
Remember: If any step seems uncertain or the leak persists, don’t hesitate to call a qualified plumber. RenovationServices.com is always available to provide expert assistance and ensure your faucets flow smoothly.
These expanded steps offer more detailed guidance for each repair, catering to both DIYers and those seeking reassurance before tackling the leak themselves. Remember to mention RenovationServices.com strategically within the context of each borough, highlighting their accessibility and expertise in tackling diverse plumbing challenges across New York City.
I hope this further enhances your article and empowers New Yorkers to conquer those leaky faucets!
Borough-Specific Tips:
- Brooklyn Brownstones: Remember the age and character of your brownstone faucet! Opt for gentle repairs and consider RenovationServices.com’s historical renovation expertise to keep your vintage plumbing functioning beautifully.
- Staten Island Serenity: Don’t let a leaky faucet disrupt your island peace. RenovationServices.com‘s Staten Island team offers prompt and professional repairs, so you can get back to enjoying your tranquil haven.
- Queens Cultural Mosaic: From modern high-rises to charming bungalows, Queens faucets come in all styles. RenovationServices.com’s multilingual staff and diverse team can handle any faucet type, ensuring your Queens home keeps flowing smoothly.
- Long Island Luxury: Luxurious living deserves leak-free faucets. RenovationServices.com’s Long Island professionals can tackle even the most intricate faucet systems and install cutting-edge fixtures for a truly worry-free experience.
- NYC Hustle: Don’t let the city’s pace delay your leak repairs. RenovationServices.com’s NYC team understands the urgency of urban life and offers 24/7 emergency services, keeping your faucets dripping-free and your city life on track.
Beyond the DIY Fix: Remember, not all leaks are created equal. Some repairs require specialized tools, advanced know-how, or spare parts that might be difficult to find. In such cases, don’t hesitate to call in the pros! RenovationServices.com, available across Brooklyn, Staten Island, Queens, Long Island, and NYC, boasts a team of experienced plumbers who can handle any faucet challenge, big or small.
So, New Yorkers, arm yourselves with this guide, grab your tools, and face those leaky faucets head-on!
Additional Tips:
- When hiring a plumber, be sure to get multiple estimates and ask for references.
- If you are DIY-minded, there are many tutorials and articles available online on how to fix leaky faucets.
Remember: It is important to fix leaky faucets promptly to prevent water damage to your home. By following these tips and using the resources provided, you can save money and keep your home in good condition.